High-end pendant lights do more than illuminate a kitchen island, they anchor the room’s visual identity and set the tone for the entire space. Whether a homeowner is finishing a new build or upgrading an existing kitchen, the right fixtures bridge function and design. In 2026, luxury pendant lighting leans into bold materials, architectural silhouettes, and energy-efficient LED integration. This guide covers what makes a pendant “luxury,” which styles deliver impact, how to size and hang them correctly, and what installation challenges to expect. No fluff, just the details needed to make a confident choice and execute it right.
Table of Contents
ToggleKey Takeaways
- Luxury pendant lights for kitchen islands combine task lighting, visual scale, and material quality—starting at $200 per fixture for hand-blown glass, brass, or powder-coated steel that resists daily wear.
- Correct sizing follows a simple formula: fixture diameter should be one-third to one-half of the island width divided by the number of pendants, hung 30 to 36 inches above the countertop.
- Glass and crystal pendants require heavy-duty ceiling framing and compatible LED dimmers to prevent flicker, while metallic finishes like brushed brass need maintenance planning for longevity.
- Installation demands proper electrical work—turning off power at the breaker, verifying junction box capacity (50 lbs maximum), and matching wiring correctly to ensure safety and compatibility with dimmer switches.
- Industrial and modern metallic designs offer flexibility for different kitchen styles, but bulb type and shade geometry must match your island’s primary function—task work versus ambient mood lighting.
Why Luxury Pendant Lights Transform Your Kitchen Island
A kitchen island often doubles as prep space, dining counter, and social hub. Lighting it with generic fixtures wastes an opportunity. Luxury pendants deliver three advantages: focused task lighting, visual scale, and material quality that holds up under daily use.
Task lighting matters because countertop work, chopping, reading recipes, plating, requires consistent illumination without glare. High-end pendants use diffused glass, metal reflectors, or integrated LED arrays to distribute light evenly. Cheap fixtures throw harsh shadows or create hotspots.
Visual scale is non-negotiable in open-plan kitchens. An island spans 4 to 8 feet in most homes, and pendant lights need proportional heft to balance cabinetry, appliances, and ceiling height. Designer-approved kitchen ideas often feature statement lighting as the room’s anchor element, not an afterthought.
Material quality separates luxury from commodity. Hand-blown glass, solid brass hardware, and powder-coated steel finishes resist tarnish, scratching, and UV degradation. Budget fixtures use plated zinc that flakes within two years. Expect luxury pendants to start around $200 per fixture and climb past $1,000 for custom or designer pieces. Price correlates with warranty length, replaceable components, and compatibility with dimmer switches, details that matter when the fixture hangs over a high-traffic zone.
Top Luxury Pendant Light Styles for Kitchen Islands
Glass and Crystal Statement Pendants
Hand-blown glass and cut crystal remain perennial choices for homeowners who want drama and light refraction. These materials amplify natural daylight and create sparkle at night. Look for fixtures with seeded glass (intentional bubbles), ribbed textures, or faceted crystal that casts prismatic patterns across countertops.
Installation note: glass pendants are heavy. A single 12-inch globe can weigh 8 to 15 pounds. Verify that the ceiling junction box is rated for the fixture’s weight and anchored to a ceiling joist or cross-brace, not just drywall. Use a stud finder to locate solid framing before mounting the canopy.
Dimming is essential. Pair glass or crystal pendants with a compatible LED dimmer (check the fixture’s spec sheet for recommended models). Standard incandescent dimmers can cause LED flicker or buzzing. Lutron and Leviton both offer dimmer switches rated for low-wattage LED loads, typically 150W minimum.
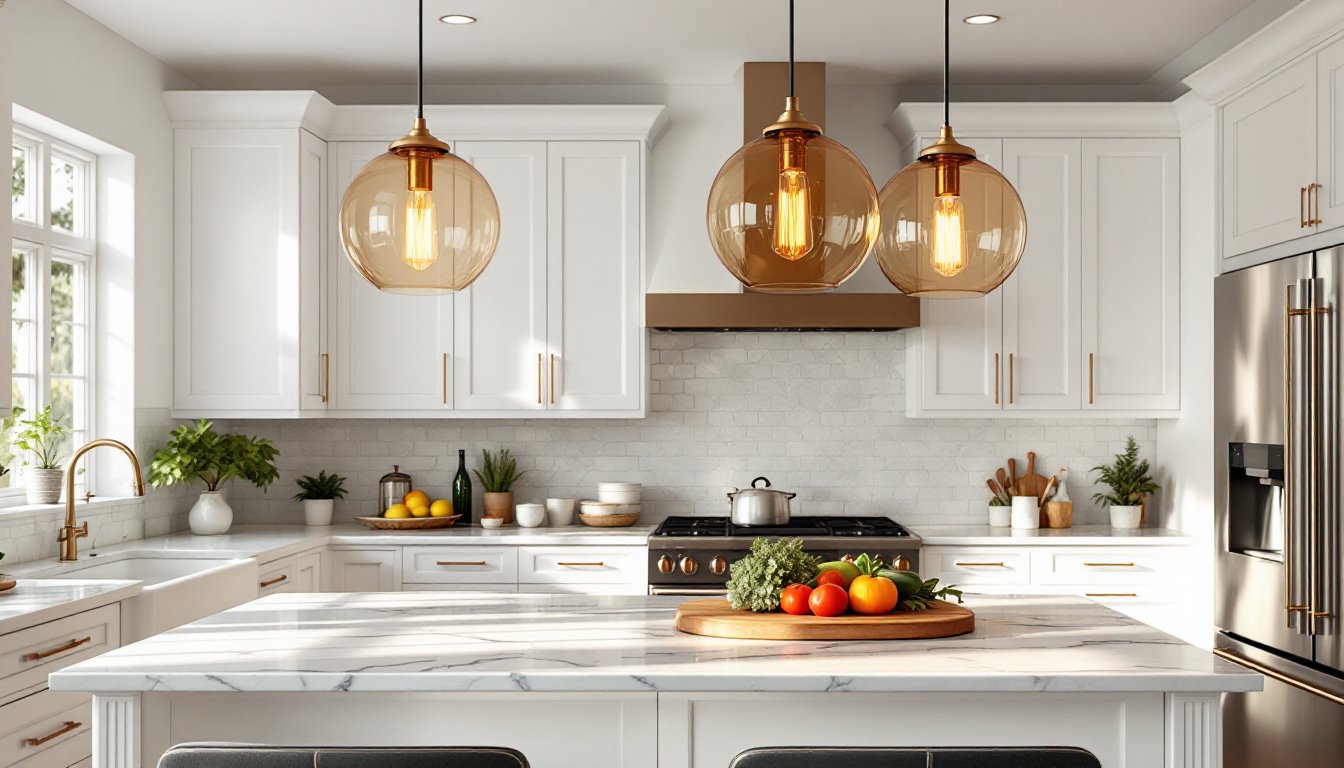
Modern Metallic and Industrial Designs
Brushed brass, matte black steel, and aged bronze dominate the metallic category. These finishes complement both warm wood cabinetry and cool quartz or marble countertops. Industrial-style pendants, think cone shades, cage frames, or exposed Edison bulbs, suit farmhouse, transitional, and loft interiors.
Key detail: metallic finishes require upkeep. Lacquered brass resists fingerprints and oxidation: unlacquered brass develops a natural patina over time. Powder-coated steel is nearly maintenance-free but can chip if struck. Interior design inspiration often highlights mixed-metal kitchens where pendant finishes echo faucet, cabinet hardware, and appliance trim.
For industrial designs, pay attention to bulb type and placement. Exposed filament bulbs deliver vintage aesthetic but generate more heat than enclosed LEDs. If the fixture hangs low (under 32 inches above the counter), switch to a lower-wattage LED filament bulb to avoid discomfort when seated at the island.
Metallic pendants also reflect light differently than glass. A polished nickel cone directs light downward in a tight beam, ideal for task zones. A perforated or mesh shade scatters ambient light, better for mood setting than precision work. Match the shade geometry to the island’s function.
How to Choose the Right Size and Height for Your Island
Pendant sizing follows two rules: fixture diameter should be one-third to one-half the island’s width divided by the number of pendants, and hanging height should place the bottom of the shade 30 to 36 inches above the countertop.
Example: a 6-foot island (72 inches) with three pendants. Divide 72 by 3 = 24 inches per zone. Each fixture should be roughly 8 to 12 inches in diameter to fill the space without crowding. For two larger pendants, divide 72 by 2 = 36 inches per zone, so each fixture can be 12 to 18 inches wide.
Ceiling height matters. In a standard 8-foot room, 30 to 36 inches of clearance keeps sight lines open for people standing across the island. In a room with 10-foot or vaulted ceilings, the pendant can hang slightly lower or use a longer downrod to maintain visual connection. Adjustable-height fixtures (with locking collars or pulley systems) offer flexibility during installation.
Spacing between pendants should be even, measured center-to-center. For three fixtures over a 72-inch island, mark positions at 18, 36, and 54 inches from one end. Use painter’s tape on the ceiling to visualize placement before drilling.
Weight and electrical load: Check the fixture’s spec sheet for total weight and wattage. Most residential junction boxes support up to 50 pounds, but verify with a fan-rated box if the pendant exceeds that threshold. If the existing box is a standard plastic nail-on model, replace it with a metal remodel box anchored to solid framing.
Installation Tips for Luxury Pendant Lighting
Turn off power at the breaker, not just the wall switch. Use a non-contact voltage tester to confirm the circuit is dead before touching any wires. Luxury fixtures often include grounding wires and multi-conductor cables, skipping the ground risks shock and voids warranties.
If the existing junction box isn’t positioned where the pendants need to hang, relocating it requires opening the ceiling. This is straightforward in new construction or accessible attics, but in finished rooms with limited attic access, consider hiring a licensed electrician. Kitchen design solutions often emphasize planning lighting layout before drywall goes up to avoid costly rework.
Wiring basics: Match black (hot) to black, white (neutral) to white, and bare copper or green (ground) to the box’s ground screw. Use wire nuts rated for the wire gauge (typically 14 AWG for 15-amp circuits, 12 AWG for 20-amp). Twist wires clockwise before threading the nut on, then tug to confirm a solid connection.
For multiple pendants on one circuit, daisy-chain the wiring or run separate home runs to a central junction box. Daisy-chaining saves wire but limits independent control. If the homeowner wants to dim only one pendant or switch them separately, install a multi-gang box with individual switches.
Hanging the fixture: Thread the canopy over the downrod or cord, feed wires through, and secure the rod to the fixture body with a set screw. Attach the mounting bracket to the junction box, lift the fixture into place, and secure the canopy with cap nuts or a decorative collar. For glass or crystal fixtures, handle shades with clean cotton gloves to avoid fingerprints.
Safety gear: Wear safety glasses when drilling overhead, and use a stable step ladder tall enough to work without overreaching. If the fixture weighs more than 20 pounds, recruit a helper to hold it while wiring.
Test the installation with the breaker on and all switches in the “off” position first, then flip on. If the fixture hums, flickers, or trips the breaker, shut off power immediately and recheck connections. Incompatible dimmers are the most common culprit for LED flicker.
Conclusion
Luxury pendant lights elevate a kitchen island from functional surface to design centerpiece. Glass and crystal bring refraction and elegance: metallic and industrial styles offer durability and bold geometry. Sizing and height determine whether the fixtures feel balanced or awkward, and proper installation ensures safety and longevity. Measure twice, verify electrical capacity, and don’t skip the dimmer. The result is lighting that performs as well as it looks.