A bathroom vanity isn’t just a place to brush your teeth, it’s the anchor of your entire bathroom. When you’re ready to upgrade from builder-grade basics, a luxury modern bathroom vanity brings together clean lines, high-end materials, and smart storage in a way that changes how you experience the space every day. Whether you’re doing a full remodel or swapping out a worn cabinet, understanding what separates a premium vanity from a standard one will help you choose wisely and install correctly. This guide walks you through material selection, sizing, installation challenges, and maintenance so you get it right the first time.
Table of Contents
ToggleKey Takeaways
- A luxury modern bathroom vanity combines minimalist design, soft-close mechanisms, and premium materials like walnut or marine-grade plywood to create both style and durability.
- Proper sizing and clearance—single sink at 24-48 inches wide, double sink minimum 60 inches, with 34-36 inch comfort height—prevents cramped layouts and accessibility issues.
- Wall-mounted vanities require structural preparation with blocking anchored to studs; a fully loaded 48-inch vanity can weigh 200+ pounds and demands proper installation to prevent failure.
- Integrated storage solutions, LED lighting, and drawer organizers elevate functionality while maintaining the clean lines that define modern luxury design.
- Daily maintenance with pH-neutral cleaners, annual wood sealing, and prompt addressing of spills preserve countertop materials and extend your luxury vanity’s lifespan decades beyond standard units.
What Makes a Bathroom Vanity Truly Luxurious and Modern?
Luxury isn’t just about price tags. It’s about durability, craftsmanship, and materials that hold up under daily use in a high-moisture environment.
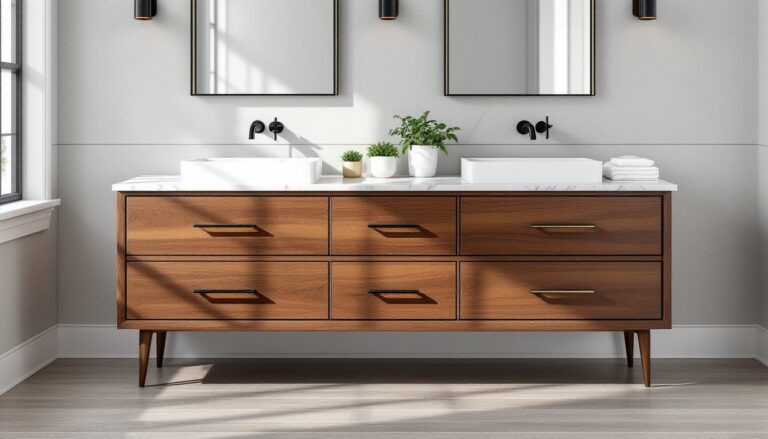
Modern luxury vanities prioritize minimalist design with concealed hardware, integrated handles, or push-to-open mechanisms. You won’t see exposed hinges or cheap plastic drawer glides. Instead, expect soft-close drawers with dovetail joinery and undermount or integrated sinks that eliminate the lip where grime collects.
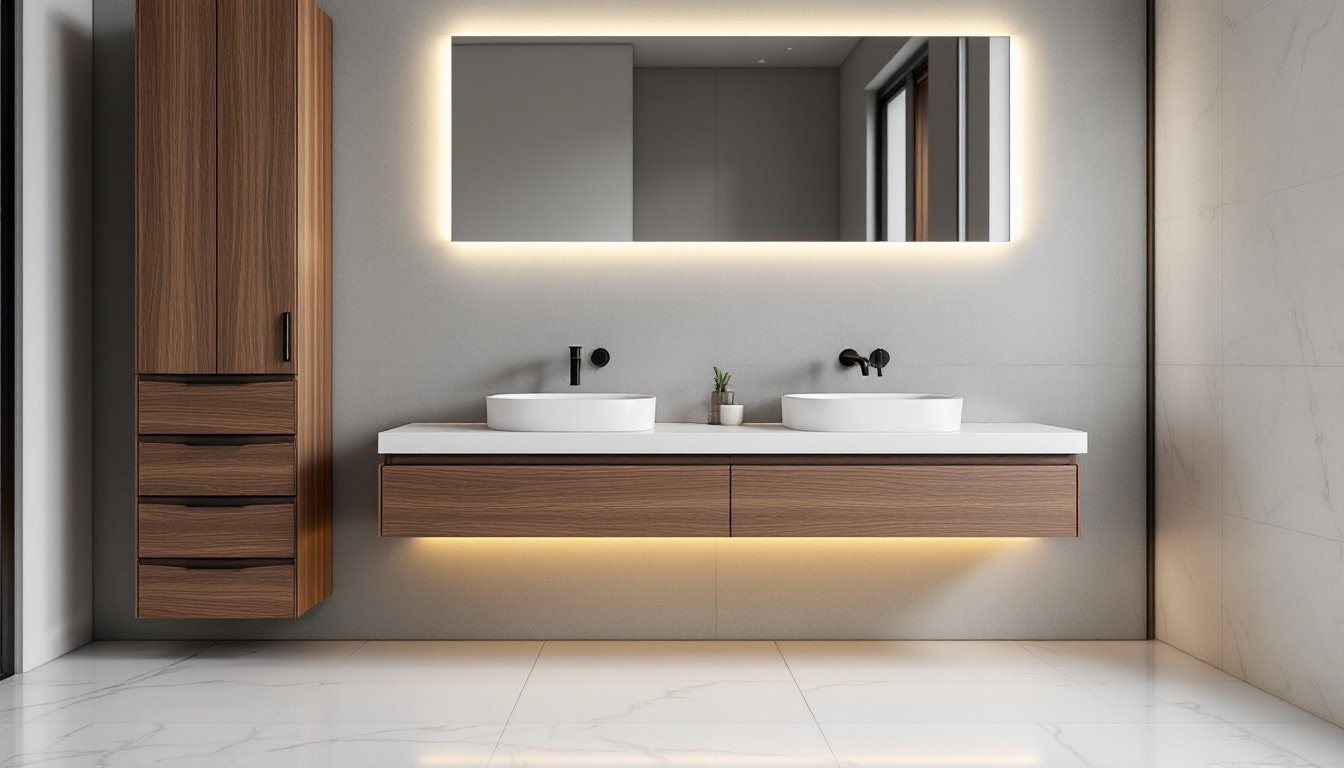
These vanities also embrace floating (wall-mounted) configurations, which create visual space and make floor cleaning easier. That requires solid blocking in the wall studs during installation, not something you can retrofit easily, so plan ahead.
Premium Materials That Define Luxury Vanities
Solid wood remains a top choice, but not all wood is equal. Walnut, oak, and teak bring natural beauty and moisture resistance when properly sealed. Bespoke walnut vanities crafted as fine furniture showcase how wood grain and hand-finished details elevate the entire room.
Engineered materials like marine-grade plywood or high-density MDF with waterproof veneer offer stability in humid conditions. Avoid particle board, it swells and delaminates quickly around plumbing.
Countertop options include:
- Quartz: Non-porous, stain-resistant, uniform appearance. Requires professional installation due to weight (roughly 20-25 lbs per square foot).
- Marble or granite: Classic luxury look, but needs annual sealing to prevent water damage and staining.
- Solid surface (Corian, etc.): Seamless integration with sinks, repairable scratches, but can scorch or scratch more easily than stone.
Hardware and fixtures matter more than you’d think. Brushed brass, matte black, or polished nickel faucets in single-handle or widespread configurations should carry a WaterSense label for efficiency without sacrificing flow. Cheap fixtures corrode or leak within a year: quality ones last decades.
Choosing the Perfect Size and Configuration for Your Bathroom
Measure twice, order once. A vanity that looks perfect online can overwhelm a small bathroom or leave a master suite feeling empty.
Standard vanity depths run 21 inches, but luxury modern bathroom vanities often come in 18-inch (compact) or 24-inch (deep) options. If your bathroom is under 50 square feet, stick with 18-21 inches to preserve walking space.
Width guidelines:
- Single sink: 24-48 inches wide works for powder rooms and guest baths.
- Double sink: Minimum 60 inches, ideally 72 inches, to give each user elbow room. Anything under 60 inches makes both sinks feel cramped.
Height has shifted from the old 30-32 inch standard to 34-36 inches (“comfort height”), which reduces back strain. Confirm what works for your household, if you’re shorter than average, the old standard may be more comfortable.
Clearance requirements often trip up DIYers:
- Leave 30 inches of clear floor space in front of the vanity (IRC requirement for accessibility).
- Maintain 15 inches from the vanity center to any side wall or obstacle.
- If installing near a toilet, keep 30 inches between centerlines.
For wall-mounted vanities, locate your studs before ordering. You’ll need to install a horizontal cleat or blocking anchored into at least two studs (16 inches on center typical framing). A 48-inch vanity fully loaded with countertop, sink, and contents can weigh 200+ pounds, drywall anchors won’t cut it.
Top Design Features in Modern Luxury Vanities
Modern design leans heavily on simplicity, but the devil’s in the details.
Integrated lighting is becoming standard. LED strips under floating vanities create a soft glow, while backlit mirrors eliminate shadows for grooming. If your vanity doesn’t include lighting, plan to add a separate fixture rated for damp or wet locations (UL listing matters in bathrooms).
Drawer organization systems separate luxury from basic. Look for:
- Divided compartments for toiletries, tools, and cosmetics
- Pullout trays or sliding organizers that use full drawer depth
- Electrical outlets inside drawers for charging razors or toothbrushes (requires a GFCI circuit and may need a permit)
Countertop space shouldn’t be an afterthought. A single sink needs at least 12 inches of landing area on one side: double sinks benefit from 6-12 inches between basins and on each end. Designers often incorporate tile accents on walls or floors to complement vanity finishes and create visual flow.
Finish trends right now favor:
- Matte or flat surfaces over high gloss (easier to maintain, hides fingerprints)
- Mixed materials: wood base with stone top, metal accents
- Monochromatic palettes with texture variation (think charcoal wood grain with black hardware)
If you’re drawn to inspiration from high-end residential projects, browsing platforms like Elle Decor shows how designers layer textures and finishes in luxury bathrooms.
Installation Considerations for High-End Vanities
Installing a luxury vanity isn’t much harder than a stock unit, but mistakes are more expensive.
Plumbing prep comes first. Measure your existing drain and supply line locations before ordering. Most vanities accommodate standard rough-in (drain 16-20 inches from floor, supplies 20-22 inches), but wall-mounted or vessel sink setups may require relocating pipes, a job for a licensed plumber in most jurisdictions.
Shut off water at the fixture valves or main line. Have a bucket and towels ready: there’s always residual water in the lines.
Wall-mounted installation steps:
- Locate studs with a stud finder and mark positions.
- Install a 2×6 or 2×8 cleat spanning at least two studs, level, at the height specified by the manufacturer (usually 28-32 inches to the top edge).
- Secure the cleat with 3-inch construction screws (two per stud minimum).
- Hang the vanity on the cleat using the integrated brackets, then fasten through the back into studs with lag screws.
- Connect plumbing, check for leaks, then attach countertop if separate.
Floor-mounted installation is simpler but still requires leveling. Use shims under the base as needed, don’t crank down the vanity to force it level, or you’ll stress joints and crack stone tops. Once level, anchor to the wall with screws into studs, not just drywall.
Countertop attachment varies. Some luxury vanities use silicone adhesive only: others require clips or brackets. Follow manufacturer specs exactly, warranty claims get denied if you improvise.
Permits: Most vanity swaps don’t require permits if you’re not moving plumbing or electrical. Adding in-drawer outlets or relocating supply lines typically does. Check with your local building department before starting work.
How to Maximize Storage Without Sacrificing Style
Luxury modern bathroom vanities walk a fine line between minimalism and practicality. You want clean lines, but you also need a place for everything.
Vertical storage works in narrow bathrooms. Tall side cabinets or floor-to-ceiling towers flanking a floating vanity keep clutter off counters without eating into floor space. Make sure tall units are anchored to wall studs at the top, tipover is a real risk, especially with heavy stone shelves.
Shallow drawers (3-4 inches deep) near the top of the vanity keep daily items accessible without digging. Reserve deep drawers (8-10 inches) for towels, hairdryers, and bulk storage.
Medicine cabinets have evolved. Recessed models with mirrored fronts and integrated LED lighting add storage without protruding into the room. Installation requires cutting into drywall between studs, doable for most DIYers with a drywall saw and a level, but plan for patching and touch-up paint.
Open shelving under wall-mounted vanities offers quick access to towels or baskets. It looks great in photo spreads, but be honest about whether you’ll keep it styled or if it’ll become a landing zone for clutter. Examples on sites like Home Bunch often show perfectly curated baskets and folded linens, not always realistic for daily family use.
Custom inserts turn generic drawers into organized zones. Bamboo or acrylic dividers, pull-out hamper bins, and tilt-out trays for sponges make use of every inch. Many luxury vanity lines offer modular organizers as add-ons: they’re worth the investment if you’re spending thousands on the vanity itself.
Maintenance Tips to Keep Your Luxury Vanity Looking New
A luxury vanity is an investment. Treat it right, and it’ll outlast cheaper alternatives by decades.
Daily habits matter most:
- Wipe down countertops and sinks after use with a microfiber cloth. Standing water etches marble, stains wood, and leaves mineral deposits on quartz.
- Avoid harsh cleaners. Use pH-neutral soap or cleaners specifically formulated for your countertop material. Bleach, ammonia, and acidic cleaners damage sealants and finishes.
- Keep exhaust fans running during and for 20 minutes after showers to control humidity. Excess moisture warps wood and promotes mold.
Wood care:
- Re-seal wood vanities annually with a water-based polyurethane or furniture wax, depending on the original finish.
- Address scratches immediately with a furniture touch-up marker or wax stick matched to the finish.
- If water penetrates the finish, sand lightly with 220-grit sandpaper, wipe clean, and re-seal the area.
Stone countertop care:
- Seal marble and granite yearly with a penetrating sealer. Test by dropping water on the surface, if it darkens or soaks in within 10 minutes, it’s time to reseal.
- Clean spills immediately, especially acidic substances (toothpaste, makeup remover, citrus-based products).
- For deep stains, use a poultice (baking soda and water paste), cover with plastic wrap, and let sit for 24 hours before wiping clean.
Hardware maintenance:
- Tighten drawer and door hardware every 6 months. Loose screws stress joints and cause misalignment.
- Lubricate soft-close mechanisms with silicone spray if they start sticking or slamming.
- Polish metal finishes with a dry cloth only, most modern finishes are coated and don’t need chemical polishes.
Plumbing checks:
Every few months, open cabinet doors and inspect under the sink for leaks, corrosion, or moisture. Catch a slow drip early, and you’ll avoid replacing swollen cabinet floors or dealing with mold remediation.
Luxury modern bathroom vanities blend form and function in ways that builder-grade units can’t touch. By choosing quality materials, sizing correctly, installing with care, and maintaining properly, you’ll create a bathroom centerpiece that performs as well as it looks, year after year.